
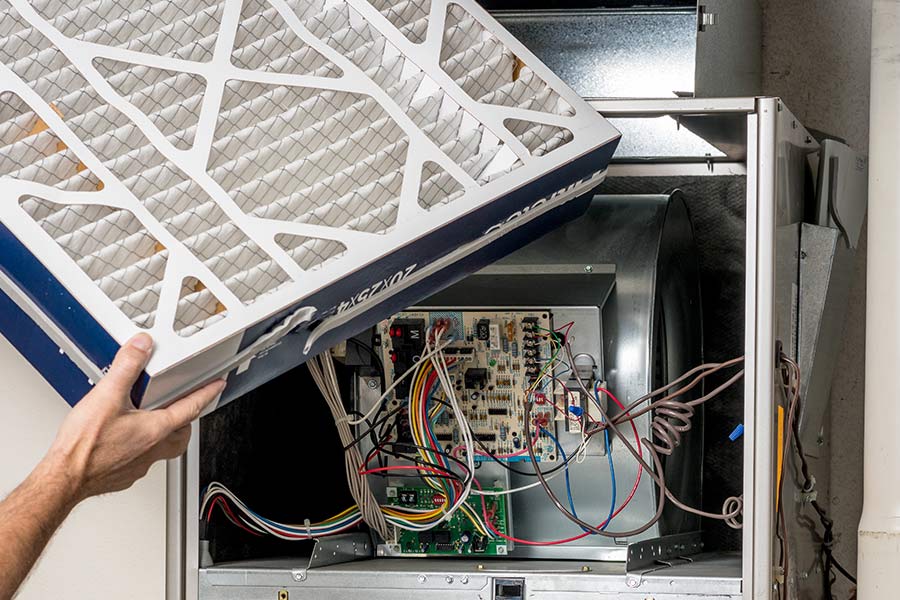
Did you know that nearly 75% of emergency winter calls to HVAC professionals are due to improper furnace maintenance? As we head into the colder months, you must take time to conduct a thorough maintenance check on your furnace. Ensuring your heating system is in top shape keeps you warm and saves you money on energy bills. But what exactly should your maintenance checklist include? Let’s go through the vital steps together, and you’ll find how simple it can be to keep your furnace running efficiently all season long.
Understanding Your Furnace Basics
Understanding your furnace’s basic components and functions is the first step toward effective maintenance. You must know your furnace’s fundamental parts, such as the heat exchanger, blower motor, and thermostat. The heat exchanger transfers heat to the surrounding air, which the blower motor propels into your home. Meanwhile, the thermostat regulates and maintains your desired temperature.
In addition to these primary parts, it’s also essential to understand other components like the filter, ductwork, and vents. The filter catches dust and debris, preventing them from clogging up your system. Regular replacement or cleaning of the filter is a must to guarantee your furnace operates efficiently. Ductwork, however, is the channel through which heated air travels to different parts of your home. Vents are the exit points for this warm air.
Being familiar with these components isn’t just about knowledge. It’s about empowering yourself to provide better service to those within your household or community. After all, understanding the basics of your furnace allows you to recognize potential problems, make informed decisions about its maintenance, and secure its longevity.
Safety Precautions Before Starting
Now that you’re familiar with the basic components of your furnace, it’s important to prioritize safety before you commence any maintenance tasks. As a dedicated helper, you’ll want to avoid actions that might harm you or the people you serve.
Firstly, always verify that your furnace is completely turned off before you start. This includes the power source and gas supply. You don’t want any potential sparks or gas leaks while you’re poking around. A small oversight can lead to catastrophic outcomes, so it’s better to be overly cautious.
Next, equip yourself with the correct tools and protective gear. This means wearing gloves to prevent burns and cuts and using the right size and type of tools for each task. Incorrect or improvised tools can easily damage your furnace or cause injury.
Checking the Furnace Filter
With your safety gear in place, the first step in maintaining your furnace is to inspect the filter, an essential component that traps dust and other airborne particles. This crucial piece of your furnace system guarantees clean, healthy air circulating throughout your home.
Here’s a quick, easy guide on how to check your furnace filter:
- Locate the filter: It’s usually found inside the furnace or the air return vent. The location can vary depending on the furnace model, so consult your owner’s manual if you’re having trouble finding it.
- Examine the filter: Remove it and hold it up to the light. If it’s hard to see through, it’s likely time for a replacement. Look for signs of wear and tear, such as rips or holes, which could allow particles to escape into your home’s air.
- Check the size and type: Verify you’re using the correct size and type of filter for your furnace. The specifications should be listed in your owner’s manual. Using the wrong filter can decrease efficiency and potentially damage your system.
Inspecting the Thermostat
After ensuring your furnace filter is in good condition, your next step is to inspect the thermostat, another critical component of your heating system. The thermostat controls the temperature in your home, telling your furnace when to turn on and off. It must be functioning correctly to maintain a comfortable and energy-efficient environment.
Start by checking the thermostat’s settings. Make sure you’ve set it to ‘heat.’ If your thermostat is programmable, check that the time and date are correct and that the temperature is set to the appropriate temperature for the day.
Next, inspect the thermostat for dust or dirt. Excessive buildup can interfere with its function. Use a soft brush or compressed air to clean the interior gently.
Test the thermostat’s accuracy by comparing its temperature reading to a separate thermometer’s reading. If there’s a significant difference, you may need to recalibrate or replace it.
Cleaning the Blower Assembly
Attention to the blower assembly is essential for maintaining your furnace’s efficiency. Over time, dirt and debris can build up in this component, affecting your furnace’s ability to distribute warm air throughout your home. As part of your routine maintenance, you must thoroughly clean the blower assembly.
Here’s a step-by-step guide to aid you in this procedure:
- Switch off the power: For safety reasons, always verify that the power to your furnace is turned off before starting your cleaning process.
- Remove the blower assembly: After confirming you’ve safely turned off the power, proceed to remove the blower assembly. It’s generally located behind the furnace’s access panel. Carefully unscrew and lift the panel to get to it.
- Clean the assembly: Use a soft brush or vacuum to gently clean the fan blades. Be careful not to apply too much force, which can bend or damage the blades. After cleaning, return the blower assembly to its original position, ensuring it’s properly secured.
Examining the Heat Exchanger
Next on your furnace maintenance checklist is the crucial step of examining the heat exchanger, a component integral to your furnace’s functionality and your home’s safety. This part transfers heat from the combustion gases to the air in your home while keeping them separate. If you’re unfamiliar with its physical appearance, it’s typically formed from a series of tubes or coils.
You’ll want to look for cracks, holes, or severe rust as part of your examination. These issues can allow carbon monoxide, a dangerous, odorless gas, to seep into your home. A professional can use special equipment to detect even the smallest cracks, but you can perform a preliminary check by looking for obvious signs of damage. Always turn off your furnace and allow it to cool before beginning this process.
If you do find damage, it’s essential to address it immediately. Remember, you’re safeguarding your furnace’s efficiency and your family’s health. A damaged heat exchanger can lead to serious issues, including furnace failure and carbon monoxide poisoning. So, take this step seriously and don’t hesitate to get professional help.
Checking the Flue Pipe for Leaks
Once you’ve examined the heat exchanger, inspect the flue pipe to ensure there are no leaks. This is an essential step in your furnace’s seasonal maintenance checklist, and it’s not as complicated as it might sound.
Here’s what you should do:
- First, visually inspect the flue pipe. Look for rust, holes, cracks, or any signs of deterioration. If you observe these, a leak will likely need immediate attention.
- Next, perform a smoke test. Light a stick of incense or a smoke pencil and hold it near the flue pipe’s joints and seams. If the smoke is sucked into the pipe or blown away from it, you’ve got a leak.
- Finally, consider using a digital carbon monoxide detector. This device can detect even the smallest leaks as an additional safety measure.
Lubricating the Furnace Motor
Moving on to the next task on your checklist, it’s important to lubricate the furnace motor to guarantee smooth operation properly. This is a key step in maintaining your furnace’s efficiency and longevity.
Before you start, confirm that you’ve switched off the power supply to avoid any electrical mishaps. For this task, you’ll need a high-quality, non-detergent motor oil. Avoid using a standard all-purpose oil, as it can damage the furnace motor over time.
Find the oil ports on the motor, usually located near the motor shaft. Remove the caps on the oil ports if present. Drip a few drops of oil into each port, being careful not to overlubricate. Over lubrication can cause as many issues as under-lubrication, including damage to bearings and seals.
Once you’ve completed the lubrication, replace the oil port caps and wipe away any excess oil. Maintaining cleanliness in the process is essential to prevent dust and dirt from getting into the motor and causing damage.
Testing the Furnace Igniter
After ensuring the motor’s smooth operation with proper lubrication, it’s time to test the furnace igniter, another important step in your furnace maintenance routine. It’s a key component that ignites the gas in your furnace to generate heat. A faulty igniter can result in reduced heat or no heat, causing discomfort during the cold season.
To test the furnace igniter, follow these steps:
- Turn Off the Power: Safety first. Before you start, turn off the power supply to the furnace. This prevents any accidents from electric shocks.
- Locate the Igniter: The igniter is usually located near the burner compartment. If you’re unsure, refer to the furnace’s manual.
- Test the Igniter: Using a multimeter, check the igniter’s resistance. If the reading is outside the manufacturer’s specifications, it’s likely that the igniter needs replacement.
Scheduling Professional Furnace Inspection
Despite your best efforts to maintain your furnace, it’s important to schedule a professional inspection at least once a year to guarantee all parts function at their best. This inspection guarantees peak furnace performance and longevity, saving you from costly repairs or replacements.
When scheduling an inspection, choose a certified, experienced technician. They’ll thoroughly examine your furnace, checking components such as the heat exchanger, flue pipe, burners, blower, and safety controls. They’ll also inspect the overall condition of the furnace, looking for signs of wear and tear, rust, or other potential issues that may affect its efficiency.
During the inspection, the technician will clean the furnace and replace worn-out parts. Cleaning is vital as it removes build-up that can hinder the furnace’s operation and lead to higher energy bills. They’ll also check the furnace’s operation cycle, making sure it starts, runs, and shuts off properly.

Conclusion
Remember, an ounce of prevention is worth a pound of cure. Don’t skimp on your furnace’s seasonal maintenance. Check those filters, inspect the thermostat, clean the blower, and guarantee no leaks in the flue pipe. A little lubrication goes a long way for the motor, too. And don’t forget professional inspections – they’re essential. Keep your furnace running smoothly, efficiently, and safely. After all, it’s all about keeping the home fires burning, right?