Ever thought about installing a heat pump on your own? You’ll need to understand its working principles, select an appropriate model, prepare the installation site, set up the units, and finally test the system. Yet, with a step-by-step guide, you can manage it effectively. However, there’s a critical aspect of this process that you might overlook, an aspect that could make or break the efficient operation of your heat pump. Curious to find out what it could be? Stick around.
Understanding Heat Pump Functionality
First, you need to comprehend that a heat pump, as the name implies, works by pumping heat from one place to another. It doesn’t generate heat on its own. Instead, it extracts heat energy from the outside air or ground and amplifies it inside your home. In other words, it’s a device that transfers heat from a cooler area to a warmer area using mechanical energy, just like a refrigerator or an air conditioner.
Understand that this type of system operates on the principle of heat transfer, which consumes less energy compared to traditional heating systems. It’s quite efficient because it transfers heat, not creates it.
There are three main components in a heat pump you should know about. The evaporator absorbs the heat from the outside air or ground. The compressor, the heart of the system, raises the temperature of this heat. Finally, the condenser releases the heated air into your home.
Choosing the Right Heat Pump
Now that you understand how a heat pump works, you’re ready to choose the right one for your home. Choosing the correct heat pump is essential as it directly affects your comfort, energy usage, and bills.
Here are four factors you should consider:
- Size: The heat pump’s size must be suitable for your house. A too-small system won’t heat your home adequately, while an oversized one will waste energy. The size is typically determined based on the square footage of your home and the climate in your area.
- Energy Efficiency: Look for a heat pump with a high Seasonal Energy Efficiency Ratio (SEER) and Heating Seasonal Performance Factor (HSPF). The higher these ratings, the more energy-efficient the heat pump is.
- Type of Heat Pump: There are three types: air-source, water-source, and ground-source. Each has its pros and cons. Your choice depends on your specific needs and the resources available.
- Cost: Consider both the heat pump’s initial cost and the ongoing costs of operation and maintenance. An energy-efficient heat pump may cost more initially but will save you money in the long run.
Necessary Tools for Installation
Before diving into the installation process, you must gather all the necessary tools to guarantee a smooth and efficient operation. Let’s explore the specifics of what you’ll need.
Firstly, you’ll need a set of screwdrivers, both Phillips and flathead, for various fastening tasks during installation. A set of wrenches, including adjustable ones, are also necessary for tightening and loosening nuts and bolts.
Another important tool you’ll need is a multimeter. This device measures electrical properties like voltage, current, and resistance, confirming that all electrical connections are safe and correctly installed.
A level is indispensable to verify the heat pump is installed straight, while a tape measure is needed for precise measurements.
Wire strippers and cutters are essential for handling the electrical wiring. They’ll help you strip insulation from the wires and cut them to the required length.
You’ll also need a drill, with various drill and driver bits, for making holes and driving screws into walls and other surfaces.
Lastly, remember to bring personal protective equipment (PPE) such as gloves, safety glasses, and possibly a hard hat. Installing a heat pump can be a risky task, and it’s crucial to protect yourself during the process.
Preparing the Installation Area
To guarantee a successful installation, thoroughly prepare the area where you’ll be installing the heat pump. Verify that the location is suitable and that the necessary preparations are made ahead of time to avoid any complications during the installation.
Here are four vital steps that you need to follow:
- Clear the Area: Remove any obstacles in the installation area. This includes furniture, debris, and other objects that may interfere with the installation process.
- Check the Ground: Make sure the ground where you’ll place the outdoor unit is flat and stable. It’s also important that it’s not prone to flooding or excessive moisture.
- Mark the Spot: Once you’ve chosen a suitable location, mark the area where you’ll install the heat pump. This will provide a clear outline of where the unit will go, helping to prevent any mistakes during the installation.
- Prepare for Electrical Connection: Finally, confirm an accessible electrical connection nearby. The heat pump needs a dedicated circuit, so you may need to prepare wiring in advance.
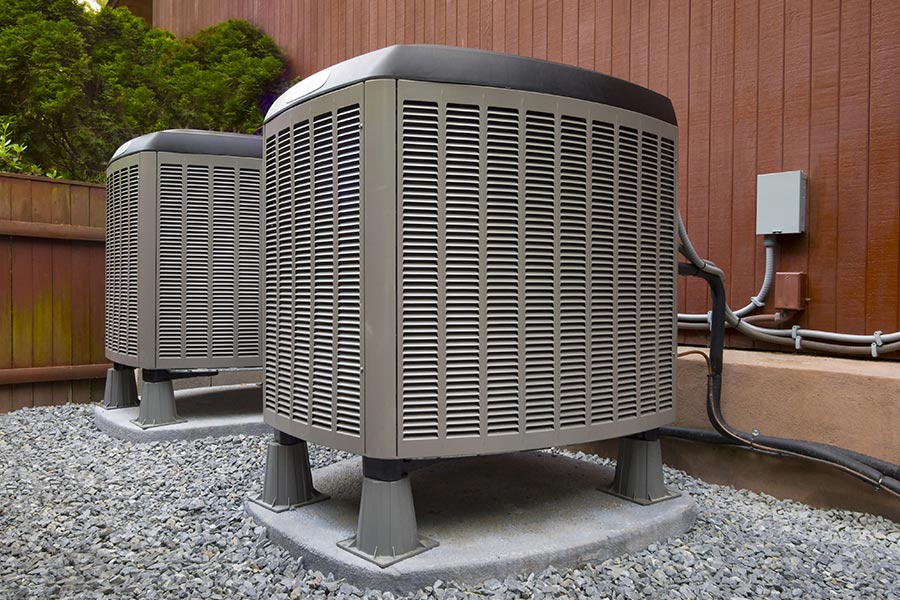
Setting Up the Outdoor Unit
Once the installation area is properly prepared, it’s time to set up your heat pump’s outdoor unit. This is a vital component as it houses the compressor that circulates the refrigerant necessary for heat exchange.
Firstly, place the unit on the mounting pad, guaranteeing stability. It’s essential to keep the unit level to prevent operational issues later on. If you’re installing on a roof, use a roof bracket instead. Once positioned, verify there’s sufficient space around the unit for airflow and maintenance access.
Next, connect the refrigerant lines. These lines run between your indoor and outdoor units, transferring heat. Be careful not to kink these lines during installation, which can cause system failure. Use a torque wrench to connect the lines, ensuring a tight seal without overtightening.
Finally, connect the electrical lines. Your outdoor unit requires a dedicated circuit. Connect the power cables to the unit, then run them to your home’s electrical panel. Remember, working with electricity can be dangerous, so take precautions or hire a professional.
Setting up the outdoor unit is vital to operating your heat pump efficiently, so take your time and be thorough.
Installing the Indoor Air Handler
Now that you’ve successfully set up the outdoor unit, it’s time to install the indoor air handler. This device circulates warm or cool air throughout your home, and its installation is a critical step in setting up your heat pump system.
Here’s a step-by-step guide on how to install the indoor air handler:
- Choose an Ideal Location: The air handler should be placed in a central location, typically in a basement, attic, or utility closet. Make sure it’s near a power supply and has enough space for maintenance and repair work.
- Mount the Air Handler: Use the manufacturer’s bracket to mount the air handler to the wall or place it on a flat surface. Confirm its level for best performance.
- Connect the Air Handler to the Ductwork: Attach the air handler to your home’s existing ductwork. This will allow the heat pump to distribute air evenly throughout your home.
- Wire the Air Handler: Following the manufacturer’s instructions, connect the air handler to your home’s electrical system.
Do not rush this process. Confirm that you’ve followed all the steps correctly before connecting the indoor and outdoor units.
Connecting the Indoor and Outdoor Units
The pivotal step in your heat pump installation journey is bridging the indoor and outdoor units, creating a seamless system that efficiently heats or cools your home. To run the conduit, you’ll start this process by drilling a hole through your wall, typically about 3 inches in diameter. This conduit is essential as it’ll house the power cable, refrigerant tubing, suction tubing, and condensate drain.
Once the hole is drilled, you’ll feed the conduit from the indoor unit to the outdoor unit. It’s important to guarantee that the conduit is securely fastened and sealed on both ends to prevent air leakage, which could affect the system’s efficiency.
Next, you’ll connect the wires from the indoor unit to the outdoor unit. Always follow the manufacturer’s wiring diagram to ensure you’re connecting the wires correctly. Incorrect wiring can lead to system malfunctions and potential damage.
Following that, you’ll connect the refrigerant lines. These pipes carry the refrigerant between the indoor and outdoor units. Ensure you’ve properly flared the ends of the lines before connecting them. Also, don’t forget to tighten each joint securely to prevent refrigerant leakage.
In the end, you’ve created a unified system ready to heat or cool your home.
Setting Up the Thermostat
After successfully connecting your indoor and outdoor units, it’s time to focus on setting up your thermostat, an essential component in controlling and enhancing your heat pump’s performance. The thermostat enables you to manage the temperature within your home efficiently, ensuring a comfortable environment while keeping your energy bills in check.
Here’s a step-by-step guide to help you set up your thermostat:
- Locate the Thermostat: Find a suitable location for your thermostat. It should be away from direct sunlight, drafts, doorways, and windows since these can affect its readings.
- Mount the Thermostat: Use the mounting screws provided to secure the thermostat to the wall. Make sure it’s at the best level for operation.
- Connect the Wires: Carefully connect the wires to the appropriate terminals on the thermostat. To avoid mistakes, follow the manufacturer’s wiring diagram.
- Program the Thermostat: Once everything is connected, it’s time to program the thermostat according to your preferences. This usually involves setting the date, time, and desired temperatures for different times of the day.
Testing the System
Once you’ve set up the thermostat, it’s crucial to test the heat pump system to confirm it’s working correctly and efficiently. Here’s a step-by-step guide to verify you’re on the right track.
Firstly, switch on the heat pump and listen for any unusual noises. If you hear grinding, squeaking, or other abnormal sounds, a mechanical problem may need to be addressed.
Next, feel the air coming out of the vents. It should be warm when the heat pump is in heating mode and cool when it’s in cooling mode. If it’s not, there may be an issue with the refrigerant or the air handler.
Check the thermostat reading to confirm it’s accurate. If it’s not, recalibrate it according to the manufacturer’s instructions. It’s also a good idea to use a separate thermometer to verify the thermostat’s accuracy.
Maintaining Your Heat Pump
With the system tested and verified for proper operation, let’s now focus on keeping your heat pump in tip-top shape through regular maintenance. Proper care of your heat pump extends its lifespan, maintains efficiency, and reduces the risk of sudden breakdowns. Here’s a 4-step guide to help you maintain your heat pump.
- Clean or Replace Air Filters: Dirty filters restrict airflow and decrease efficiency. It’s advisable to clean or replace your filters every month in high-use seasons and every three months during low-use periods.
- Check the Outdoor Unit: Keep the area around your outdoor unit free of vegetation and debris. Also, check the coil and cabinet and clean them if necessary.
- Inspect Ductwork: Look for any leaks or blocks in the ductwork. Poorly sealed or insulated ducts can reduce your system’s efficiency by up to 20%.
- Schedule Professional Maintenance: Even with regular DIY upkeep, it’s important to have a professional inspect and service your system at least once a year. They’ll catch potential issues early and keep your system running smoothly.
A well-maintained heat pump guarantees you stay warm in winter and cool in summer while keeping your energy bills in check.

Conclusion
To summarize, installing a heat pump isn’t a walk in the park, but it’s certainly doable with the right knowledge and tools. Remember, an energy-efficient heat pump can reduce your electricity use for heating by approximately 50%, making the effort worthwhile. Keep up with regular maintenance to guarantee peak functionality and longevity of your system. After all, the success of your heat pump installation depends on your attention to detail and diligence.